访问nextcloud中的图像文件#
在这个notebook中,我们将演示如何从nextcloud服务器下载文件,如何在本地处理它们,以及如何将结果上传回服务器。
如果你在莱比锡大学工作或学习,你可以在这里注册一个这样的服务器账户。
from skimage.io import imread, imsave
from skimage.measure import label
import ipywidgets as widgets
import stackview

import nextcloud_client
登录#
在本地执行下一个单元格后,你会看到三个输入字段,你可以在其中输入服务器URL、用户名和密码。
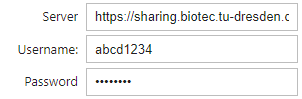
server_widget = widgets.Text(value='https://speicherwolke.uni-leipzig.de', description='Server')
username_widget = widgets.Text(description='Username:')
password_widget = widgets.Password(description='Password')

widgets.VBox([server_widget, username_widget, password_widget])
输入用户名和密码后不要按Shift-Enter
if username_widget.value == '':
    raise RuntimeError('Enter username and password above')
ncc = nextcloud_client.Client(server_widget.value)
ncc.login(username_widget.value, password_widget.value)
# 重置密码
password_widget.value = ""
典型的错误消息是401:访问被拒绝。请检查你的用户名和密码。
浏览远程服务器#
要查看连接是否成功,我们可以列出给定文件夹中的文件。
# 输入owncloud驱动器上存在的文件夹。'/'是根文件夹。
remote_folder = "/data/"

for f in ncc.list(remote_folder):
    print (f.path)
/data/blobs.tif
检索文件#
我们可以将文件下载到本地目录。
# 在这里输入源文件
remote_source_file = '/data/blobs.tif'
# 输入目标位置
local_file = 'blobs.tif'

ncc.get_file(remote_path=remote_source_file,
            local_file=local_file)
True
图像处理#
由于我们已经下载了文件,图像处理可以照常进行。
image = imread(local_file)
stackview.insight(image)

|

|
labels = label(image > image.max() / 2)
stackview.insight(labels)

|
|
上传结果#
在将图像上传到云之前,我们需要将其本地保存。
local_file_to_upload = "blobs_labels.tif"

imsave(local_file_to_upload, labels, check_contrast=False)
我们将把文件上传到这个文件夹:
remote_folder
'/data/'
ncc.put_file(remote_folder, local_file_to_upload)
True
为了确保,我们再次打印出文件夹中的文件,检查文件是否已到达。
for f in ncc.list(remote_folder):
    print (f.path)
/data/blobs.tif
/data/blobs_labels.tif
登出#
完成后,请登出!
ncc.logout()
True