Transformaciones afines usando scikit-image#
Este notebook demuestra cómo aplicar transformaciones afines a imágenes 3D.
import numpy as np
import matplotlib
import matplotlib.pyplot as plt
from skimage.io import imread
# Laod example data
np_array = imread('../../data/Haase_MRT_tfl3d1.tif')
np_array.shape
(192, 256, 256)
Para configurar una transformación afín, puedes hacerlo usando una matriz de transformación 4x4:
transform_matrix = np.asarray([
    [1, 0, 0, 50],
    [0, 2, 0, 0],
    [0, 0, 0.5, 0],
    [0, 0, 0, 1]
])
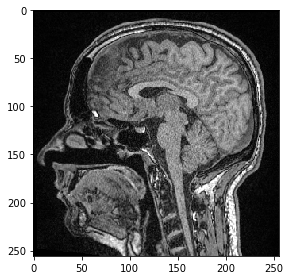
Scikit-image solo admite transformaciones 2D, por lo que seleccionamos un corte para transformarlo:
# pull image stack from GPU and pick a slice
image = np_array[100]

from skimage.io import imshow
imshow(image)
<matplotlib.image.AxesImage at 0x25a6cff0d30>
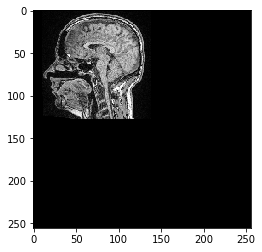
Ahora definimos una transformación afín usando scikit-image y la aplicamos a la imagen.
from skimage import transform as tf

# define transform with #scikit image
transform = tf.AffineTransform(scale=0.5, translation=[10,0])

transformed_image = tf.warp(image, transform.inverse)
imshow(transformed_image)
<matplotlib.image.AxesImage at 0x25a6edb8d60>
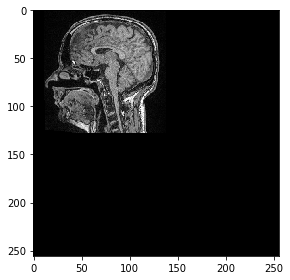
Interoperabilidad con clesperanto#
A continuación, enviamos esta imagen de un solo plano a la GPU y la transformamos usando pyclesperanto
import pyclesperanto_prototype as cle

cle.select_device('RTX')
<gfx90c on Platform: AMD Accelerated Parallel Processing (2 refs)>
image_gpu = cle.push(image)

# define transform with #scikit image
from skimage import transform as tf
transform = tf.AffineTransform(scale=0.5, translation=[10,0])

transformed_image = cle.affine_transform(image_gpu, transform=transform)
cle.imshow(transformed_image, color_map="Greys_r")
c:\structure\code\pyclesperanto_prototype\pyclesperanto_prototype\_tier9\_imshow.py:14: UserWarning: The imshow parameter color_map is deprecated. Use colormap instead.
  warnings.warn("The imshow parameter color_map is deprecated. Use colormap instead.")